Soldering
Most of the semi-permanent to permanent prototyping techniques use soldering to make secure mechanical and electrical connections. Soldering uses a hot iron to heat the two wires/leads/pads and then flows a wire with a low melting point into the joint. Learning how to make clean and strong joints is essential to making reliable circuits. In this section we will cover the basic tools that are used in the lab and learn several basic soldering techniques.
Tools
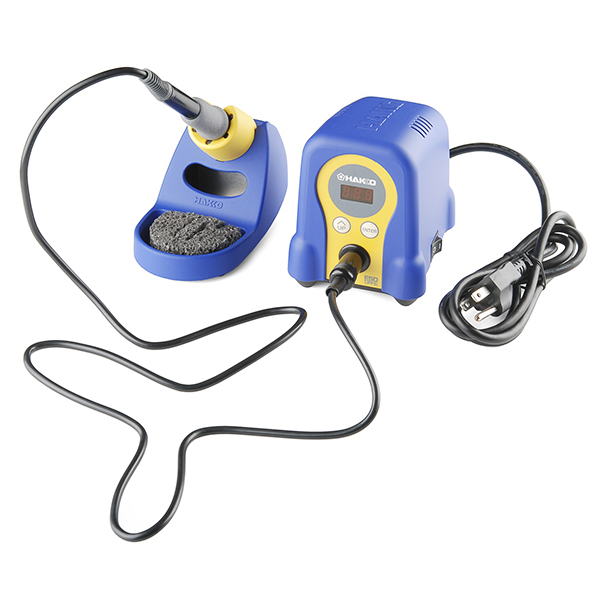
Soldering Iron - A good soldering iron must have an adjustable temperature control. Irons that just plug into the wall are nicknamed “fire starters” and should never be used - they are a good way to burn off PCB pads or wait for long times to heat large joints. Sticking with a reputable brand (Hakko, JRC) is recommended. You should purchase a large number of the iron tips for replacement and for different tasks. A needle point tip is often used by beginners, but is NOT an effective tip for most applications. A narrow chisel-like tip is recommended.
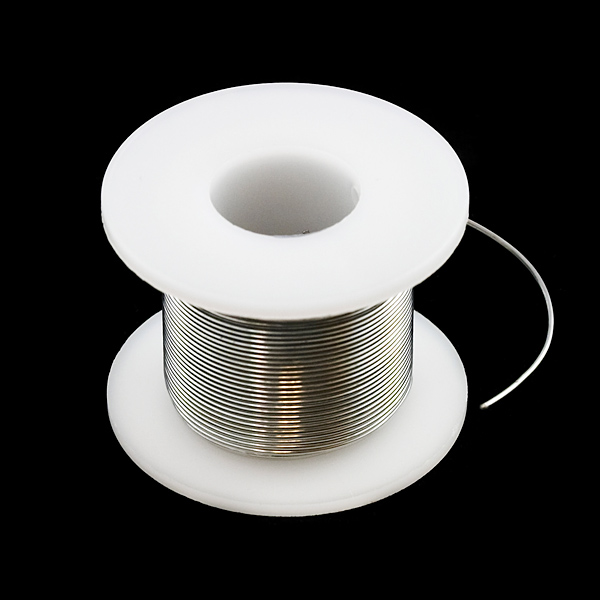
Solder - Available in leaded and lead-free varieties, solder is a low melting point alloy that makes a solid mechanical and electrical connection. A multi-core rosin solder is recommended. Beginners usually find it useful to learn with leaded solder as it flows better, but be sure to wash your hands and reduce the chances of any lead contamination. For most electronics work a fine gauge solder is easiest to work with. Larger diameter solders are used with large power connections and large joints.
Flux - Flux cleans the joint and allows you to make a good solder joint. There are many types of flux and many arguments for using each. For a beginner a good liquid no-clean flux in a flux pen is a good choice. There are thicker flux pastes that are also preferred by some as they can help adhere small components to the circuit board. While many solders have enough flux for new joints, it is essential to add flux for any kind of rework of a solder joint.
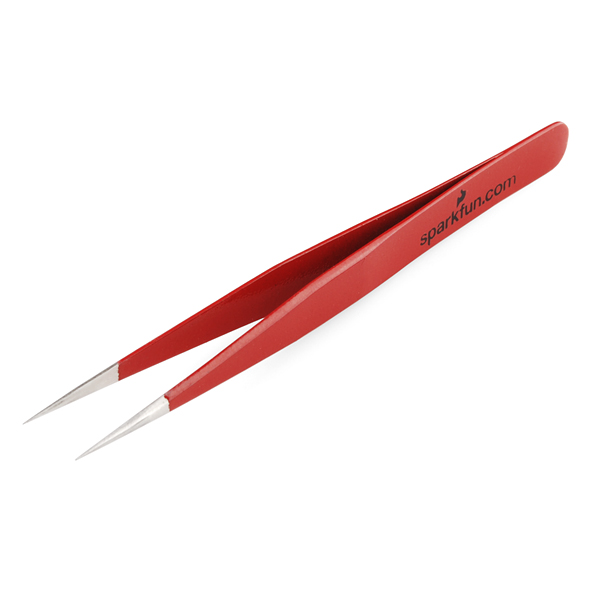
Tweezers/Pliers - When soldering you often need to bend component leads and twist connections together. Small tweezers (curved and straight) are recommended, along with small flat nose pliers. These are all available from any electronics equipment provider. Wire strippers and diagonal cutters are also useful to keep on the bench. These tools should be dedicated to electronics and not used anywhere else in the lab!
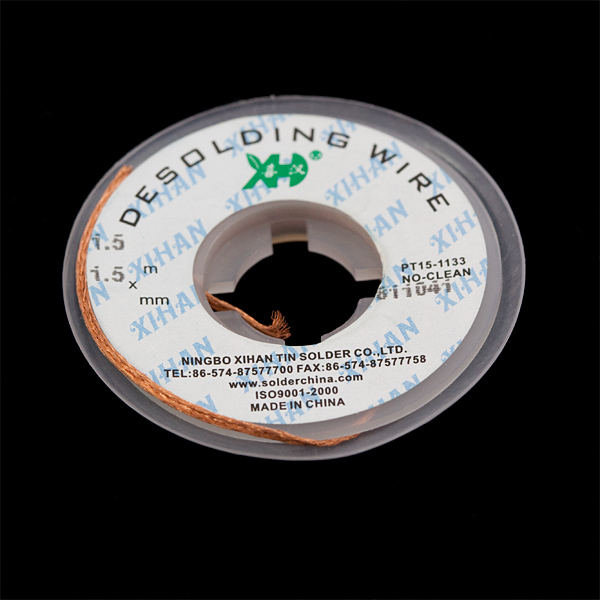
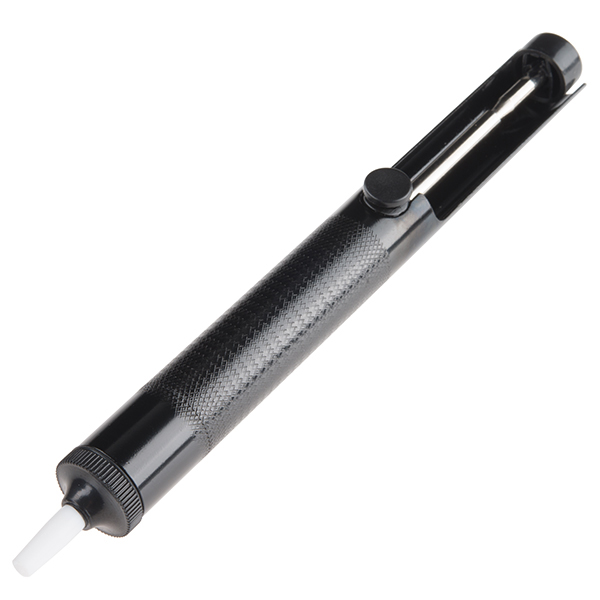
Solder Braid - When removing solder from a joint, solder braid can be used to wick the solder away from the joint. It is a cheap and effective desoldering method.
Solder Vacuum - When removing many through-hole components, it is useful to purchase a solder vacuum. These can be a separate tool used to suck up melted solder or a dedicated desoldering iron with a hollow tip and built in vacuum pump. Desoldering with these tools can be very fast.
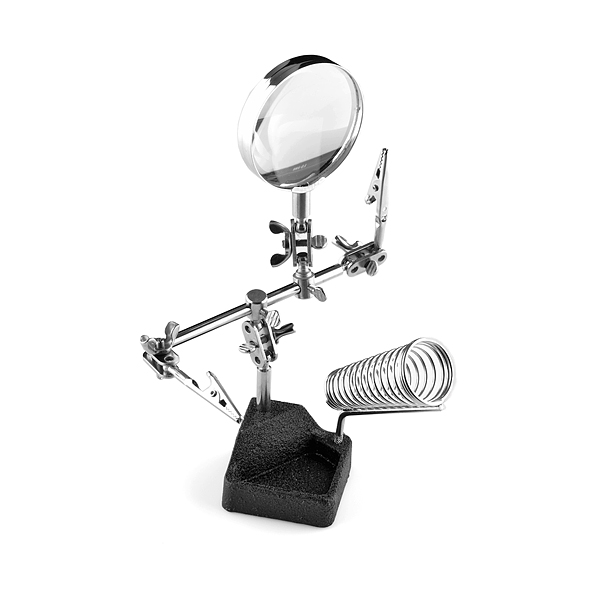
Third-Hand/Board Holder - When soldering it is necessary that the circuit be firmly fixed and not moving around. Using a “third hand” device or other board holder/fixture can make many tasks much simpler and less frustrating. There are a range of products on the market including clip based tools, board vices, and others. A small vice, such as the Panavise Jr. and flexible hand like the SparkFun Third Hand are nice to have on the workbench.
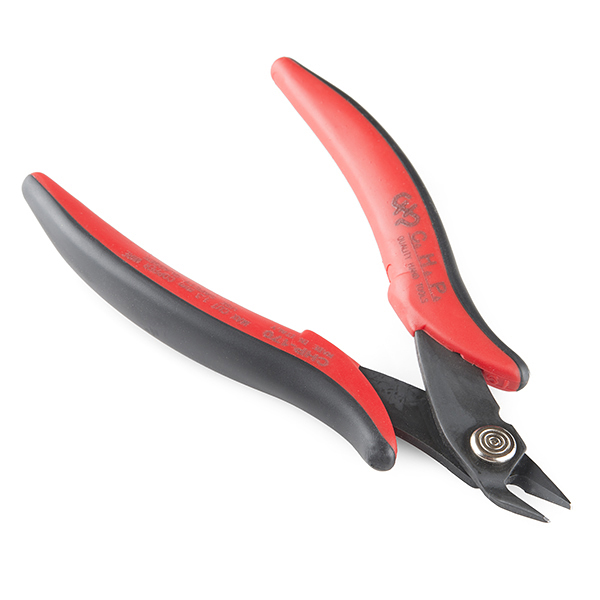
Flush Cutters - Use these to trim component leads off close to a PCB. Never use the flush cutters on any hard material as it will dent the jaws and ruin the tool. Only cut component leads and small gauge wire.
Technique
Soldering technique is difficult to describe with simple diagrams, but Dave Jones has made an excellent three part soldering tutorial that is well worth your time to watch. It is helpful to practice these techniques on some junk boards or components before working on your project.
Safety Precautions
Soldering involves a very hot iron and potentially dripping or flying hot metal and flying wire bits from trimming. Safety glasses should be worn at all times. Being aware of burn care techniques is a good idea incase you do accidentally burn yourself. Make sure the soldering iron is off when not in use as it is a potential fire hazard and dramatically decreases the life of the iron tip. Some find it helpful to use a timed outlet to make sure the iron is off after a fixed amount of time.